New Pen Tablet

I have been focusing on improving my drawing skills recently, using a two-in-one laptop as a drawing tablet. I enjoy the digital experience for drawing and painting, but working on a laptop is not ideal for learning.

With the laptop, I still need a separate keyboard for shortcut keys in Clip Studio Paint. So either I need a space next to me wherever I am sitting (if the laptop is in my lap while drawing) or enough space on my desk for another keyboard (if drawing on a desk). Since the latter requires me to clear space on my desk (which I use every day for work and has a wired keyboard and mouse taking up space), this adds a significant obstacle to using my desk each night. Therefore, I typically fall back to drawing on the couch with the tablet in my lap.

In either case, I still only have one 16-inch screen for Clip Studio Paint, reference images, and tutorials, which is very limiting. I have a good layout for having reference on the side of my screen and CSP taking up two-thirds of the rest, but I do not have a good way of following along with tutorials on the same screen of my laptop.

Finally, since I am drawing on my couch, I also usually have the television on while drawing. This is great for making it easy to find motivation to get started, but not so great for focus and actual learning.

To improve this situation, to reduce daily obstacles to drawing and improve my focus, I decided to upgrade my home desk setup to include a pen display. I decided to get the Huion Kamvas Pro 24 4k:
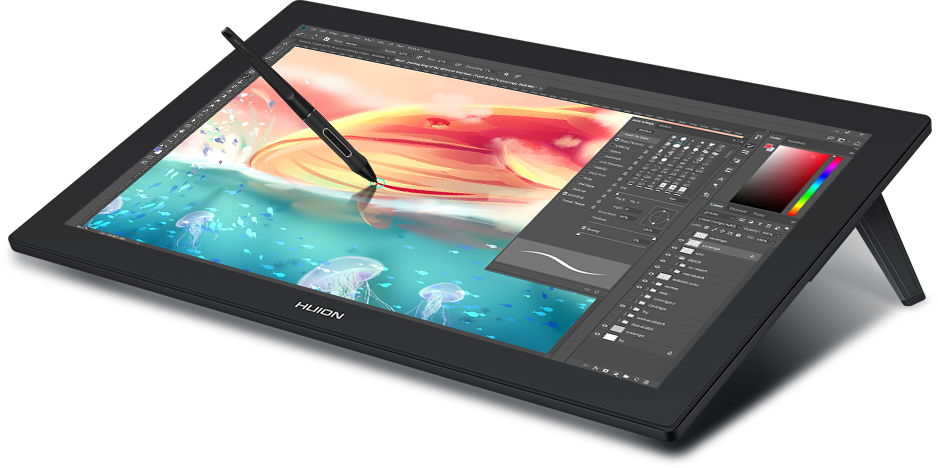
I replaced my existing 1080p monitor with the new pen display, and kept my existing 4K monitor as my primary display. I also added a nice monitor arm, so I can easily use the pen display as either a normal monitor or pull it down for drawing.

I can use my other monitor for reference and tutorials. And my desk is in a separate room from our televisions, so I can better focus on learning.

My laptop is still a great portable alternative for traveling. But I am excited to see how my new home setup will help with improving my drawing skills.

New Recording Equipment

I recently had to record a live talk for someone and I wanted to get good sound from the person speaking. Unfortunately, up until now all of my sound recording experience was in a homemade studio using a full-size microphone hooked up through a computer. So I had to invest in some new audio equipment, but I did not want to spend a lot of money.

Fortunately, I found an excellent budget solution that still gives very good sound quality. I put a lavalier microphone on the speaker and ran it to a small sound recorder in her pocket. Continue reading “New Recording Equipment”

LED Strip Desk Lights

When I bought a new computer a few months ago, I also purchased a replacement for my ten year old monitor. Although the colors on my old monitor are very inaccurate due to age, it has no other problems so I decided to keep using it in a two-monitor setup.

While it is great that I have twice as much screen space, I lost a lot of physical desk space. Which means that I no longer have enough room for my desk lamp. So I began to search for an alternative desk lighting solution and found a way to create custom lights using LED strips.

The interesting thing about LED strips is that you buy them in a large roll (usually up to 5 meters in length). Then you can cut them to whatever size you want, at marked two-inch intervals, and wire them together as needed.

So I bought some inexpensive multi-color LEDs from Amazon, which included a power block and a remote for controlling the lights. I also had to make a few local purchases for wire and additional connectors. Then I soldered together the LED strips in the general shape and size of the back of my two monitors. Finally, to add a little extra light (and make my desk look cooler), I added a strip of LEDs to the back of my frosted-glass desktop, so the light diffuses through the desk.

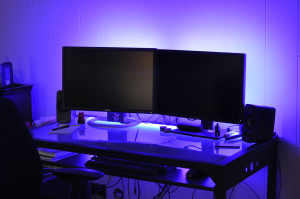
The picture below shows the result. I normally have the light set to a warm-white setting, but for the picture I set it to a deep blue. I can choose between about twenty different colors, which is mainly nice because I can choose which shade of white light to use (pure white from a LED is pretty stark — I prefer a warmer light, especially at night). Just in case I decide to have a dance party in my office, I can also turn on various strobe effects, but I doubt I’ll ever need those.

My new LED desk lights, set to blue. Click to view full size image.

My New Computer

As I mentioned in a previous post, I have been busy putting together a new computer. My current computer is about four years old and still runs fine, but my backup computer recently died and that gave me an excuse to get some computing upgrades. (My “backup computer” is actually used to back up my files, along with any files my wife wants to back up from her laptop. Then the files on my backup computer are uploaded up to CrashPlan for even better data security.)

Inspired by the computer that Pi Visuals built, I decided to build my own computer. My last few computers have been Dell, but I have noticed that there are less customization options through the Dell website. Since the main goal of my computer is to perform well during 3D animation tasks, it will have similar characteristics to a gaming computer. But I do not need all of the features that come with a high-end gaming system, like RAID hard drives or overclocked processors. And that is the best advantage of building your own computer: you can pick and choose between any features you want, as long as it fits into your budget.

Continue reading “My New Computer”

IOGear 4-Port KVM

I continually switch between my personal computer and my work laptop. Rather than physically move from one computer to another, I use a KVM switch.  For those that do not know, KVM is short for “Keyboard, Video, Mouse”. By connecting one monitor, keyboard, and mouse to the output of the switch and multiple computers to the inputs, I can easily switch between computers by just changing the port number on the KVM. The computer that is connected to the active port of the KVM is able to access the monitor and receive input from the keyboard/mouse.

Modern KVMs are more than just physical switches, however. When a computer is connected but not on the active port, the KVM still has to regularly communicate with the computer to pretend that the devices are still connected. For instance, you do not want your video card to lose sync with the monitor and revert to a default small resolution, causing your desktop icons to reshuffle around! And to make life even easier, many KVM switches include “hotkey switching”, which allows you to type in a short sequence of keys on your keyboard to switch to a different port or even activate other options.

Continue reading “IOGear 4-Port KVM”